Select Page
Rapid Rice Straw Composting

Rapid Rice Straw Composting

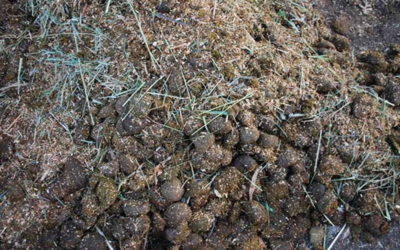
Rapid Rice Straw Composting-Rice straw manure is an ordinary manure, which requires three months for complete decomposition. This is a very slow process for those farmers who grow rice crops two or three times a year. The IBS is a rapid composting method, speed up the process with a compost fungus activator, Trichoderma harzianum. The activator is supplemented by soil microbes as a source of waste cellulose decomposers. The number of decomposers and the rate of decomposition so that farmers can use the compost sooner.

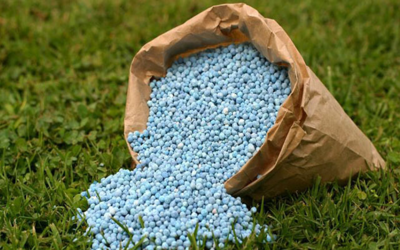
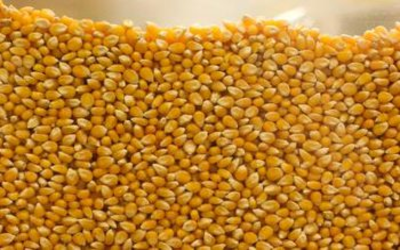
For carbon composting for early composting, such as: – rice husk, nitrogen -rich content such as animal manure and the activator Trichoderma harzianum are required. A combination one part of nitrogen substrate to three part carbon is best. If animal manure is getting difficult, it can be replaced with leguminous plants such as azolla and sesbania.

Preparation Method: –

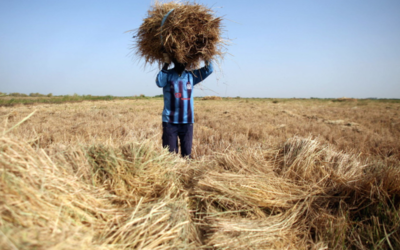
  • At the time of harvesting, rice straw is kept on one side of paddy. It later saves labour to have one compost pile for each paddy instead of  central heap.
  • Rice straw is soaked overnight in irrigation water or moisture in the rain until saturated.
  • A simple platform is made in the middle of the paddy ( size is relative to the size of the paddy).
  • A layer of saturated rice straw 10-15 centimetre thick is loosely  of rice on the platform.
  • Above the layer, one or two handful activator is spread out (25 kg / ha).
  • Straw is alternatively layered with the activator.
  • Until all the straw has been used.
  • On the layers of straw, fertilizers and nitrogenous plants are planted. The nitrogen substrate is 15-25% of total composition.
  • Compost is covered (with plastic, banana leaves, or coconut husks) and it gets heated within 25 hours.
  • The manure should be repeated repeatedly to compensate for evaporation,.
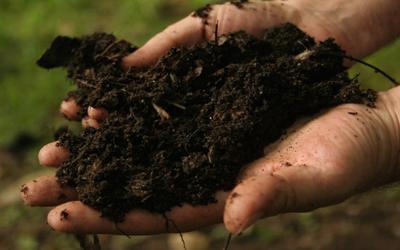
  • Manure is left unturned and ready within a month.
  • When the pile gets cold, then it is ready to use.
  • It is 30% of its original size.

Benefit:-

The benefit of income gains from a healthy crop is the most immediate return. But more importantly, the soil is benefits from continuous use of compost in the long term. Results include improved soil texture and ploughing, better aeration and water-holding capacity, increased fertility and low acidity. Because rice husk is made compost and it is not burnt. It releases less carbon dioxide into the atmosphere. Compost reduces the need for chemical fertilizers. Which contaminate surrounding waters  and  encourages algae bloom that compete with fish for oxygen. Additionally, as  farmer gain self-reliance they becomes less dependent on off-farm inputs.

Possible Drawbacks

  • Rapid composting like composting in general.
  • Often means more work for the farmer.
  • Labor inputs can be reduced by composting in the paddy and in small piles that are easily transportable.
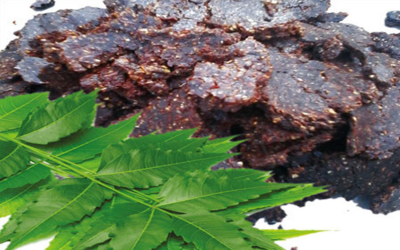
  • A reliable supply of T. harzianum is important for facilitate the rapid decomposition process.
  • Contaminants reduce the effectiveness of the activator, and can cause skin irritation.
  • limited manure supply may result in compost with low N content.

Poonam Singh


Manures and Fertilizers

Manures and Fertilizers

Manures and Fertilizers – The plants need food / nutrients / elements for their growth and development, which are absorbed through the soil. The sources of nutrient supply are manure and fertilizer. Application of manure and fertilizers to the soil is one of the important factors, which help in increasing the crop yield and maintain the soil fertility. N, P and K are the 3 essential elements required for the crop growth.

Manures and Fertilizers

1. Manure:

It is a well disintegrated. All the excreta left by the animals and the straw, the litter, which is in the Stable, the barn or yard, all of it are included in it.

The term manure is used with the exception of water to any material,  when combined into soil and it becomes productive and promotes growth of the plant.

2. Fertilizer

These are industrially manufactured chemicals containing nutrients of plants. Or

It is an artificial product, which contains nutrients of the plant. Those who increase productivity when put into the soil, and also promotes plant growth along with them.

Difference between Manures and Fertilizers:-

Sr No Characteristics Manures Fertilizer
1 Origin Plant or animal origin Chemical synthesized or manufactured
2 Nature Organic in nature Inorganic in nature
3 Type Natural product artificial product
4 Conc. Of nutrients less concentrated More concentrated
5 Material Supply organic matter Supply inorganic matter
6 Nutrient availability slowly available May or may not be readily  available
7 Nutrients Supply all the primary nutrients including Micronutrient Supply specific type of nutrients one, two or three. micro nutrients may or may not be present
8 Effect on Soil Health Improves physical condition of soil Do not improve the physical condition of soil
9 Effect on plant growth No bad effect when applied in large quantities. Adverse effect on plant whenever there is deficiency or excessive application

Poonam singh

Neem cake Fertilizers

Neem cake Fertilizers

Neem cake Fertilizers – Remnants of oil emitted from neem seeds, which are used after grinding of neem kernels are crushed for their oil. In this seed kernels are nutrients such as NPK (nitrogen-phosphorous-potassium) as well as nortriterpenoids and isoprenoid. These nutrients are  nematicidal in nature so the seed cake ends with these properties. Neem cake  is used in agriculture, horticulture, floriculture and the turf industry as an organic fertilizer as well as a natural insecticide. Neem cake is used as organic fertilizer because of the various micro and macro nutrients. It will control, at the same time, soil-based pathogens as well as  nematodes. It also inhibit the nitrification of the soil plus enhances the efficiency of nitrogen providing fertilizer.

Neem cake fertilizer is an excellent organic fertilizer. Its essential ingredients and other micro nutrients are: –

  • Nitrogen
  • Phosphorus
  • Magnesium
  • Potassium
  • Calcium
  • Sulfur
  • Zinc
  • Copper
  • Iron
  • Manganese

Uses of Neem cake Fertilizers: –

There are several reasons for using neem cake as soil amendment: –

1.It is bio-degradable and it can be used with many different types of fertilizers.

2. It will increase the efficiency of other fertilizers you use because it will inhibit nitrification .

3. Apart from this, it is free from any heavy metal, so it is safe for crop use.

4. It is gradually free, which means the nutrients are free in a uniform. This ensures constant growth of your crops or plants during the growing season. Because it will release the nutrients slowly that means your crops will have nutrients throughout the growing time.

5. The neem cake acts as a nutrient for plants rather than being a nutrient collector. The neem cake contains NPK (nitrogen-phosphorous-potassium) plus other micro nutrients, so your plants are fed continuously.

Benefits of Neem cake Fertilizers: –

  • Both do double work of pesticides along with fertilizer.
  • Increase the quality of soil.
  • Reduces the growth of soil pests and bacteria.
  • Provides necessary macro nutrients for the development of all plants.
  • Helps to increase the yield of plants in the long run.
  • Organic is destructive and environmentally friendly.
  • Excellent soil conditioner

Poonam Singh


Leaf Mold

Leaf Mold

Leaf mold is a form of compost, which gradually changes into the humus before it breakdown due to slow fungus. There are two main factors need for making a leaf mold: – The presence of adequate moisture and oxygen in the air.

Leaf mold is like a soft pillow, which is naturally found in the forest just above the soil. It is gradually disintegrated. Along with giving nutrients gradually to plants, it also improves soil structure. Leaf mold is not as rich in the value of nutrients. As much as in the completely composted leaves, but it is easy to make and its process is faster.

Leaf mold makes  a useful mulch around the garden. It has excellent ability to maintain water. A good quality topsoil can hold around 60 percent of its weight in water, but leaf mold can hold between 300 to 500 percent of its weight in water.

(A) How to make a leaf mold: –

Originally all the leaves are carbonated. Some nitrogen-rich material like grass clippings take a lot of time to break and the decomposition process for leaves takes at least six to twelve months.

1. The first method of making leaf mold, consist of either pilling your leaves into a wood or wire bin in a corner of the yard. The pile or bin should be at least three feet wide and long. Pile up your leaves, and thoroughly dampen the entire pile.

2. Check the level of moisture occasionally during dry period and if necessary water and pour it.

3. The second method of making leaf mold requires a large plastic garbage bag. Fill the bag with leaves and moisten them. Seal the bag and then make some holes or cut slit in the bag for air flow. Then leave the bag for a few days. Check the bags twice a month for moisture. If the leaves are dry, then pour water into it.

After six months in a year, you will end the leaf mold. You can do some things to speed up the process: –

1. Before putting the leaves in your pile or bag, run over them once or twice with your Lawnmower. Smaller pieces will break down faster.

2. Use a shovel or garden fork to change the leaf pile every few weeks. If you are using a plastic bag method, just turn it over or give it a strong shake. In this process the air will be used, which triggers decomposition.

3. If you are using a pile or bin method.

4. Then cover your pile with a plastic torp.

5. This will keep the leaves more consistently moist and warm.

(B) Benefits of Leaf Mold

You must be wondering why you should not just make compost. Why bother making a different pile just for leaves? The answer is that while compost is very amazing for improving soil texture and fertility.

  • At the same time, the leaf mold is much better as soil modification.
  • It does not provide much nutrition.
  • So you will still need to add compost or other organic fertilizers to increase fertility.
  • Leaf mold is essentially a soil conditioner.
  • It increases the water retention of the soil.
  • The addition of leaf mold, water retention in the soil increased by more than 50%.
  • Leaf mold also improves soil structure.
  • It provides a fantastic habitat for soil life. Which includes earthworm and beneficial bacteria.

(C) How to use Leaf Mold: –

  1. The left mold is ready to use when it is soft and crumbly.
  2. Distribute it to your perennials, vegetation plants (shrubs, too if you have a lot of it).
  3. No thick more than about 3 inches thick. Because the leaf mold retains so much moisture.
  4. It should be kept several inches back the crown or base of the plant.
  5. It helps prevent pest and disease problems.

Tip: Leaf mold is slightly acidic, so if you add ground limestone if you plants are sensitive to acidity.

Poonam Singh

Lasagana garden

Lasagana garden

What is a lasagana garden?

1. Lasagna gardening is all about kinds of layers.

2. The goodness of it is that you can keep these gardens anywhere.

3. Keep it in sufficient sunlight and it is fairly flat.

4. They can be big or small depending on your needs.

5. You do not need to worry about tilling up a space.

6. Simply submit the layers over the layers. Unless it happens in the right height.

7. You can use compost, compost, leaves in it.

8. Anything in it will break it and feed your plants.

How to make lasagana garden: –

The steps are simple and you can change them to according your needs. You can pile up the layers on the ground. If you want you can build sides. You can build the raised beds on the legs. It all depends on you.

Here is the basic idea of lasagana gardening. You want to layers. The first item on the list is what you keep on the ground first, then layer it all until you reach the last layer, which will be on the top.

(A) Preparation method of lasagana garden: –

1. First of all, map your area. You keep this flat surface in contact with the sun for at least four hours a day. Most vegetables do not produce good in less than this.

2. Build your side or enlarged bed, or outline the area with the wheel line.

3. For the first layer, use a thick layer of paper or cardboard. It will provide a solid base and keep weeds down. If you want to go organic, then you can put a thick layer of straw below. It would be good to use 6-8 inches to start. Reserve some straw to plce in between layers. Now wet this layer.

4. For the next layer, you can use compost or manure. the compost should be well broken down for the plants to be able to take advantage of the nutrients. Along with manure should be old. Because fresh manure contains heavy nitrogen and is considered “hot”.

5. Plants need nitrogen, but too much nitrogen can burn your plants or cause spikes in green leaf activity. For herbs, it is very good, but nitrogen has to be balanced with phosphorus for good root production in the vegetables. Now wet this layer.

6. Layer about an inch of straw on top of that. The extra straw will provide some aeration. Now wet down the straw.

7. If you want to add elements of other gardening techniques such as hughlekultur, now is the time. I add some large logs to the center of my lasagana garden and then keep the next layer above it. If using logs then wet them down well after adding.

8. For the next layer, you can use vegetable peels, coffee grounds, egg shells, or basically whatever that is newly added to compost. These will break down gradually and add more nutrients to the soil. Cover again with straw and wet down the layer.

9. For the next layer, add anything “brown”, which means carbon based. Examples are straw, shredded newspaper, cut leaves, used napkins, toilet paper tubes, newsletters, etc. If you have not used straw, add a layer. Now water the layer.

10. Now you will want another “green” layer. Vegetable peels, lawn grass, coffee ground – anything that is nitrogen-based. Are you still watering? Good! Continue to pour water after each layer.

11. Keep walking in this way, as long as your garden is at least two feet deep. If you want you can go very deep. Remember, after a while, some elements of your garden will be broken and it will not be as long as it was about to start.

12. For the final layer, you can use compost or manure (well old).

13. plant your plants!

(B) Benefits of lasagana gardening: –

There are many reasons to create a lust garden. Here are a few:

  • You can put them anywhere in adequate sunlight.
  • There is no digging, tilling, or cultivating, except when you plant and harvest.
  • There are less weeds.
  • They can be built to any height.
  • If you have a yard, then you can use all existing materials.
  • local manure and compost from neighbors can be used.
  • They can be any size you want.
  • You can use whatever materials you want.
  • There is less water is required.

(C) Consider additional issues: –

As with any garden, there are some things to consider:

1. If you are using logs, try to stay away from cherries, locusts, or anything that may be toxic. Cherry wood is bad for animals, so I had hesitate to use it with food gardens. locust is always breaking down, so it can be used for a few years. Try to stick with pine, maple, oak, and other such wood.

2. problems of insects can be reduced, but it is not eliminated. Sprinkle Cayenne pepper around to discourage raccoons, mice, and rats.

3. Sprinkle some cinnamon around to prevent fungal diseases. It will help keep things like powdery mildew at bay.

4. If you need to treat for bugs, then use a natural product like neem oil.

5. Spray the base of the plant and try to keep away from the flowers. Because you won’t to damage bees, the major pollinator of gardens.

6. If you surround your garden, use natural wood products, do not treat anything.

7. Check your cardboard for staples, tape and gum. They will not break down in a garden, if used, then it will be very slow.

8. Make sure to use straw and not hay. Straw breaks down very well, and add nitrogen in the soil. Hay takes more time to break down and there are so many seeds in it. That will grow in your garden and produce weed.

Poonam Singh

Compost Tea Fertilizer

Compost Tea Fertilizer

What is compost tea?

To keep it simply, compost tea is a liquid fertilizer and full of biologically active compounds, which slow down a plant’s disease. The tea  is made by soaking small quantity of remaining compost in water and adding food source (brown sugar or jaggery) to feed the hungry microorganisms inside the soil. The process of evaporation of the water gives to present micro-organisms all the tools they  need to reproduce. so once the mix is done brewing you are left with a nutritionally rich, well-balanced supplement with incredible value as an organic liquid fertilizer.

Preparation Method of compost tea fertilizer:-

Caution: Make sure to use a finished compost. unfinished compost can be contain  harmful pathogenic, and compost that is too old may be nutritionally deficient

1. Fill a 5 gallon bucket 1/3 full of quality finished compost.

2. Fill with water to a few inches below the top.

3. Allow the mixture to rot for 3-4 days.

4. Stir the tea as often as you can.

5. Filter the mixture in a bucket through a cheesecloth or any other porous fabric. Add the remaining compost to your garden or put it back in your compost bin.

6. Dilute the remaining liquid with water using a 10: 1 ratio of water to tea. (The contents in your water cans should have the look of a weak iced tea.

7. Spray fertilizer using foliar-spray on soil or leaves.

Benefit:-

1. Better plants growth in the  form of good taste vegetables, bigger blossoms and greener leaves.

2. Increase of beneficial organisms, that enhances the immune system of plants.

3. Plenty of nutrients for the plants that are easily absorbed directly through the plants roots.

4. Encourage the growth of root systems to help your plants remove nutrients from a farther down.

5. Provides an all-natural alternative to harsh chemical composts that cause harm to native plants, insects, wildlife, and even humans.

Poonam Singh

Epsom Salt

Epsom Salt

Epsom salt is the best use in the garden – one of which is as a insect resistant and pesticide.

Spraying and sprinkling are two of the most effective ways to using these magnesium rich salts to combat bugs.

Hydrated magnesium sulfate aka epsom salt contains two important elements: –

1. Those who need to maintain the optimum health of plants.

2. Magnesium plays an important role during photosynthesis.

3. It is also necessary by plants for the proper functioning of many enzymatic processes.

4. Seeds also required magnesium to germinate. Sulfur aids plant with many functions including amino acids production, increase root growth, and the formation of chlorophyll. This mineral also gives coal crop and Aliums their signature flavors. Fertilize onion, broccoli and cauliflower with Epsom salt to get healthier, sweeter-flavor vegetables. Use Epsom salt on tomatoes, chillies and roses plants grow stronger with more blossom. Epsom salt use as a normal fertilizer, Epsom salts are a cheap way to give healthy nutrients throughout your garden. An Epsom salt solution is also a great way to replenish magnesium and sulfur levels in depleted potting soil.

Uses of Epsom salt: –

1. Mix one tablespoon of Epsom salt with one gallon of water.

2. Apply to garden plants as a foliar-spray once every two weeks.

3. When feeding rose plant, use one tablespoon of salt per foot of the plant’s height mixed in a gallon of water. Spray once in the spring when the leaves begin to appear and again after rose starts bloom.

4. for vegetables, sprinkle a tablespoon of Epsom salts around each seedling as soon as they are transplanted in the garden. Repeat this feeding following the first bloom and fruiting. Mix two tablespoons of salt in one gallon water and use this solution in place of normal watering once per month.

5. Mix one cup of the salts in five gallons of water to make Epsom salt spray. Fill into a spray bottle and apply to the affected plants.

6. this will work to burn slugs and beetles, ensuring they keep their distance.

7. An easy choice, that you apply the application on every plant in the second week, sprinkle the salts around the base of your plants. This will not only deter pests. Rather increase nutrition absorption, as magnesium helps plants roots take up important nutrients such as nitrogen, phosphorus and sulfur.

Poonam Singh

Corn Gluten Meal Fertilizer

Corn Gluten Meal Fertilizer

Corn Gluten Meal Fertilizer is a product made from Corn, which is also to the soil as granules. As soon as the corn gluten breaks down, it releases a high level of nitrogen.

It also creates a thin barrier over the soil, due to which it is made to be an effective pre-emergent weed control.

It is mainly used in lawn, but even desired plants have emergence, its can also be used in the vegetable gardens. Corn gluten releases nitrogen from one to four months.

Corn gluten is a powdery by product of the corn milling process. Which is basically used as a supplement in hog feed.Corn gluten has become a common organic alternative for chemically derived herbicide.It can be effective as a pre-emerging herbicide, which is used to control crabgrass and other lawn weeds.It also has fertilizing properties. Corn gluten contains about 10 percent nitrogen.

How Does Corn Gluten Work?

Corn gluten does not prevent weed seeds from germinating, but it prevents seeds from forming roots after germination. This means that applications must be given very carefully timed.

When corn gluten is applied correctly time, the stem is germinated in the seed of crabgrass, but the roots are not produced, plants will die. Provided is a short dry period after seed germination.

If conditions are too wet immediately after seed germination, then weed can recover and establish a root properly.

Time to experiment: –

1. Corn Gluten is useful only as a pre-emergent herbicide.

2. It does not provide control over the emerging weed.

3. Crabgrass and other weed seeds have already germinated and produce roots.

4. late use of Corn gluten will only act as fertilizer for the weed.

5. Applications of corn gluten require timed around rainfall or watering.

6. Applications of corn gluten needs to be watered in, either by rainfall or by artificial watering, within five days of application.

7. Approximately 1/4 inch rainfall or a comparable artificial watering is ideal for this.

8. Dry period of 1 or 2 days is required to prevent weed seedling that have germinated from growing roots.

In other words, Corn gluten required water after application, but a dry period is then required in order for germinated seeds to have their root production inhibited.

Benefits of Corn Gluten Fertilizers: –

1. Corn gluten binds food and release water. Which takes advantage of a landscape in the dry areas of the year.

2. It is also an excellent source of nitrogen.

3. It is more resistant to weed attack than an under-fertilized site in a healthy lawn or landscape.

Poonam Singh


Benefits of low cost farming and how it improves life style of farmers

Benefits of low cost farming and how it improves life style of farmers

Benefits of low cost farming and how it improves life style of farmers

1. Farmers can use of organic seed and organic fertilizer.

2. Use of home-made insecticides and pesticides.

3. To develop various means of irrigation, so that more land could be brought under agriculture.

4. To increase the availability of chemical fertilizers at subsidised rates, either through production or through imports.

5. To develop and produce new hybrid varieties of seeds, which will help in increasing the yield of various crops.

6. The government would fix a minimum purchase price for various crops every year.

7. To provide adequate and timely loans to farmers, on easy terms, to buy farm machinery and other agricultural items.

8. To help protect standing crops from pests, diseases and natural hazards, such as floods, droughts and cyclones.

9. To educate and help farmers through specially developed programmes on radio and television.

10. To set up demonstration farms, so that the farmers can learn and adopt new, suitable and latest farming techniques.

11. The government should provide adequate diesel, electricity and water at highly subsidised rates.

12. Encourage the farmers to adopt mixed farming and work in cottage industries in their free time.

Poonam singh


Farm Yard Manure

Farm Yard Manure

Farm yard manure is made basically using cow dung, cow urine, waste straw and other dairy waste. This is very useful, and some of its qualities are given below:

1. Farm yard manure rich in nutrient.

2. A small part of the (N) is directly available to the plants. While a large part is made available as and when the farm yard manure decomposes.

3. cow’s dung and cow-urine are mixed, than balanced nutrition is made available to the plants.

4. Availability of potassium and phosphorus in the farm yard manure is similar to inorganic sources.

5. Application of farm yard manure improves soil fertility.

Method-

1. Cow’s dung which we get in abundance (10 cows …) which is collected after cleaning the cowshed. It is fill in a pit and and allow to decompose for some time. Every month this (manure) is applied on the plants or the field to enrich the soil.

2. we use almost whole cow dung for Gobar gas plant.

Therefore, the slurry that comes out after gas production is highly composted and very rich form of good manure. it is also used.

Nutritional status of FYM (%)-

Nitrogen 0.5000
Phosphorus 0.2500
Potassium 0.4000
Calcium 0.0800
Sulfur 0.0200
Zinc 0.0040
Copper 0.0003
Manganese 0.0070
Iron 0.4500

Use: –

1. Partially rotten farm yard manure should generally applied in 3 to 4 weeks before sowing of crops. This is used in soluble form in the development of the crop. Farm yard manure decomposed in the soil. It is improve soil structure and release the nutrients involved in it.

2. If it is applied too long before sowing the crop, the nutrients are lost by leaching by rain water. Therefore, just before the crop is sown, the farm yard manure should be mixed in the soil properly.

3. Vegetable crops Potato, tomato, sweet potato, carrot, radish, onion etc respond very well to the farm yard manure. Other responsible crops are sugarcane, rice, napier grass and garden crops like orange, banana, mango and plantation crops are coconut.

4. The large amount of nutrients present in the farm yard manure is not available. About 30 percent of nitrogen, 60 to 70 percent of phosphorus and 70 percent of potassium are available for the first crop.

Poonam Singh

Follow by Email
LinkedIn
Share